

Portolio: Inserting and Styling Content
Inserting the Expert Letter for Second-Year Students
To insert the Expert Letter, we will use the same technique of nesting a <div> tag as we did for the Scholarship Essay/College Visitation Reflection on the Education Research page. If you already inserted this essay as outlined under the instructions for Inserting Second Years Required Content for the Education Research Page, then this exercise will go fairly quickly as we will use the same ID #essayContainer we created earlier. If you did NOT complete this step, then you will need to skip down to the second set of instructions below "Creating and Styling a Nested <div> Tag".
Inserting a <div> Tag with the ID #essayContainer
As stated above, if you've already created the ID #essayContainer, then follow the instructions below. If you have NOT created the ID #essayContainer, then procede to the next section.
Make sure you open your Expert Letter in MS Word.
- Open the "career_exploration.html" file by double-clicking on the file in the Files Panel
- Delete the filler text "Career Exploration", but leave at least TWO (2) extra spaces
- Make sure you place the cursor in the first (top) space – this will save you a headache later
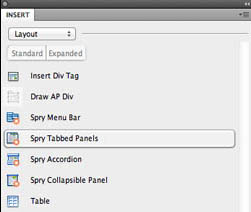
- Click the Insert DIV Tag button in the Insert panel
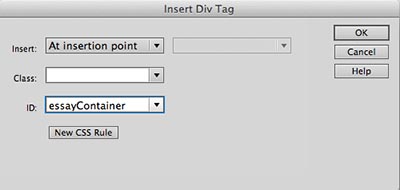
- The Insert DIV Tag dialogue box opens
- Leave the Insert point as "At insertion point"
- In the ID box, select "essayContainer" from the drop down menu like in the image below
- Click OK
- You should see a <div> tag inserted like in the example below
- After you complete the above, skip the next section and begin at "Inserting the Expert Letter"

Creating and Styling a Nested <div> Tag
If you didn't create the essayContainer ID previously, then continue with the below step.
- Open the "career_exploration.html" file by double-clicking on the file in the Files Panel
- Delete the filler text "Career Exploration", but leave at least TWO (2) extra spaces
- Make sure you place the cursor in the first (top) space – this will save you a headache later
- Click the Insert DIV Tag button in the Insert panel
- The Insert DIV Tag dialogue box opens
- Leave the Insert point as "At insertion point"
- In the ID box, type "essayContainer" like in the image below
- Click the New CSS Rule button
- The New CSS Rule dialogue box opens for the ID "essayContainer"
- Click OK
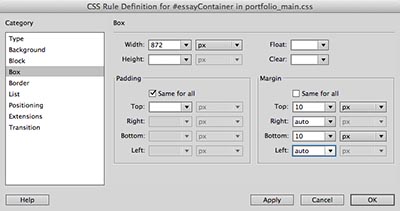
- The CSS Rule Definition dialogue box opens for ID "essayContainer"
- Select the Box property in the Category columnn
- Type "872" in the Width property box and leave the value type as pixels (px)
- Why 872px? First, I wanted 10 pixels of spacing between the left and right sides (20px total), and we will be adding a 4px border (8px total) in the next step, so 900 - 20 - 8 = 872
- In the Margin property section, uncheck the "same for all" box
- Type "10" in the top and bottom boxes and leave the value type as pixels (px)
- For the left and right margins, select auto from the drop down menu
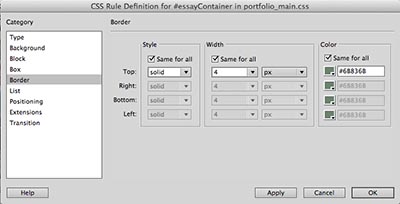
- Select the Border property in the Category column
- Select solid in the Style category for all four (4) sides
- Type "4" in the size box for all four (4) sides; leave the value type set to pixels (px)
- Select a color by clicking on the color picker – we chose the same color we used for previous borders for this page to compliment our design
- Click OK
- Click OK again
- You should see a <div> tag inserted like in the example below
Inserting the Expert Letter
- With the "Content for ID essayContainer goes here" highlighted, delete the text
- In the Word document with your letter, highlight the letter and select Edit > paste or ctrl + c
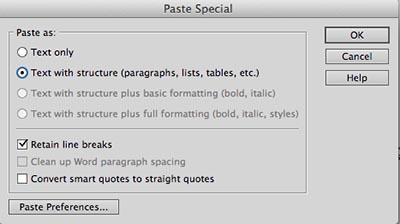
- In Dreamweaver, select Edit > Paste Special
- Check the button for "Paste with Structure"
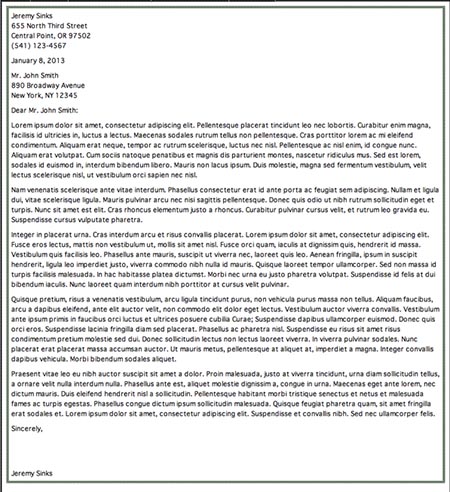
- Double-check your document to make sure it pasted correctly – you may need to go through it and add or subtract spaces for readability.
- Your letter should look similar to the image below
- Select File > Save All
Next Steps
In the next exercise, you will insert the Career Exploration Dream Job research.
