

Portfolio: Inserting and Styling Content
Formatting the Content of the Resume Page
As we hinted at earlier, there are some inherent issues with copying and pasting content from a Word document. One of those issues is that it inserts line breaks, or the line break <br /> tag, at the end of a line of text instead creating a new paragraph for the next line. The following steps will illustrate this point.
- Highlight your first and last name at the top of the document
- In the Properties Inspector, change the Format from paragraph to a Heading 1
- You should see the Heading 1 format applied to the entire section of your name and address, instead of just your name. This is because there is a <br /> tag inserted at the end of the text instead of a closing </h1> tag. The closing </h1> tag is actually at the end of the email address, so the text within the opening and closing tags receive the <h1> formatting
- These <br /> are inserted throughout the content of this pasted document. We will need to go through the entire document to elminate specific <br> tags so we can apply the proper tags to headings and other parts of the resume document.
Formatting Your Name with the <h1> Tag
- Place your cursor just after your last name, and hit the enter/return key
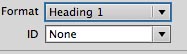
- Highlight your name, and in the Properties Inspector, select Heading 1 from the Format drop down menu
- Your name should receive the Heading 1 format, but your contact information should be a formatted as a paragraph, and look like the image below
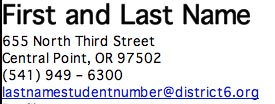
Important Change: replace your personal address and phone number with the school's address and phone number, as shown in the image above, to protect your right to privacy. Use your school email address instead of your personal email address.
Formatting the Headings with the <h2> Tag
Some headings may require additional steps to create the correct formatting for each. You may need to adjust your steps based on the formatting you used in your resume.
Formatting the Profile Heading
- If you used bullet points for your profile, then jump down to step #2; however, if you used a paragraph for your profile, divert to step "a" below
- Place the cursor just before profile paragraph, hit the backspace/delete key, and then hit the enter/return key to give the profile paragraph a <p> tag and drop it down on it's own line once again – move on to step #2
- Highlight the "Profile" heading, and in the Properties Inspector, select Heading 2 in the Format drop down menu
- The "Profile" heading should should look similar to the image below

Formatting the Educaiton Heading
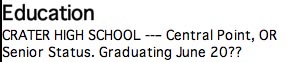
- Find the "Education" heading – it may be buried with "Crater High..." as shown in the image below
- Place the cursor just before "Crater High...", hit the backspace/delete key to emlinate the <br> tag, and then hit enter/return to give "Crater High..." a <p> tag and place it on its own line again
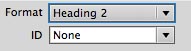
- Highlight the "Education" heading, and in the Properties Inspector, select Heading 2 in the Format drop down menu
- The "Education" heading should should look similar to the image below

Formatting the Work Experience Heading
- Find the "Work Experience" heading – it may be buried with the title of your first work experience like the image shows below
- Place the cursor just before your first work experience listing, hit the backspace/delete key to emlinate the <br> tag, and then hit enter/return to give your first work experience listing a <p> tag and place it on its own line again
- Highlight the "Work Experience" heading, and in the Properties Inspector, select Heading 2 in the Format drop down menu
- The "Work Experience" heading should should look similar to the image below


Formatting the Activities and Community Involvement Heading
- Find the "Activities and Community Involvment" heading – it may be buried with the first activity listing like the image shows below
- If you used bullet points for listing your activities, then jump down to step #3; however, if you used a paragraphs for your activities, divert to step "a" below
- Place the cursor just before activities paragraph, hit the backspace/delete key, and then hit the enter/return key to give the activities paragraph a <p> tag and drop it down on it's own line once again – move on to step #3
- Highlight the "Activities and Community Involvement" heading, and in the Properties Inspector, select Heading 2 in the Format drop down menu
- The "Activites and Comunnity Involvement" heading should should look similar to the image below


Formatting the Computer Skills Heading
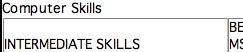
- Find the "Computer Skills" heading – if you've formatted this section using a table, it will be easier formatting this section.
- If you used a table to format your computer skills, then jump down to step #2; however, if you used a another method to list your computer skills, divert to step "a" below
- Place the cursor just before the first computer skill listing, hit the backspace/delete key, and then hit the enter/return key to give the computer skills listing a <p> tag and drop it down on it's own line once again – move on to step #2
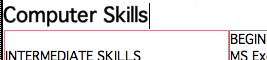
- Highlight the "Computer Skills" heading, and in the Properties Inspector, select Heading 2 in the Format drop down menu
- The "Computer Skills" heading should should look similar to the image below
Formatting the References Heading
- Find the "References" heading – if you've formatted this section using a table, it will be easier formatting this section.
- If you used a table to format your references, then jump down to step #3; however, if you used a another method to list your references, divert to step "a" below
- Place the cursor just before the first reference listing, hit the backspace/delete key, and then hit the enter/return key to give the reference listing a <p> tag and drop it down on it's own line once again – move on to step #3
- Highlight the "References" heading, and in the Properties Inspector, select Heading 2 in the Format drop down menu
- The "References" heading should should look similar to the image below

Important Change: Replace all your reference listings (you may just delete the whole table if you used a table) with "References available upon request"

Eliminate the Border Around Computer Skills
- If you used a border to format your computer skills, go to step #2
- Click the edge of the border surrounding the computer skills – you will see a "handle" appear if you've selected the entire table – see the image below
-
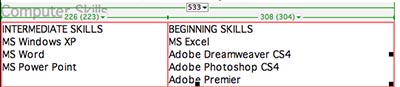
- In the Properties Inspector, type a 0 in place of "1" in the Border box

Next Steps
At this point, we've completed the basic formatting of the resume page. In the next exercise, we will style the resume page to look more professional and publishable. Don't worry about how there appears to be no line spacing between sections, we will take care of this in the next exercise.
