

Portfolio: Inserting and Styling Content
Creating and Inserting a Graphic for the Home Page
To add some visual interest and personalization to the home page of our portfolio, we will create a unique graphic representative of you and your interests.
Create a Unique Graphic in Photoshop
Depending on which course you are enrolled in, follow along with the below tutorials to create your own graphic-style image. Note: make sure you follow the size and save procedures below before inserting the graphic in our home page.
- Pop Art Graphic (required for CSB)
- "Go Big" Graphic (required for Integrated Lit)
Sizing Procedure
- Open the .psd file of the graphic
- Click Image > Image size
- Change the value type from "inches" to "pixels"
- Type 200 in the Width box
- click OK
Saving Procedure
- Click File > Save as
- Type "profile_graphic" in the File name box
- Select "JPEG (.JPG, .JPEG, JPE)" from the Format drop down menu
- Navigate to the "images" folder in your portfolio folder in your U drive by clicking the "Save in" drop down menu
- The JPEG Options dialogue box opens
- Select "medium" quality
- Click OK
Insert the Graphic on the Home Page
- If you don't have the index.html file open, Open the "index.html" file by double-clicking on the file in the Files panel
- Place your cursor BEFORE the heading "Profile"
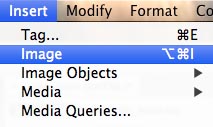
- Click Insert > Image
- Navigate to the "images" folder inside your portfolio folder
- Select your poster graphic
- Click OK
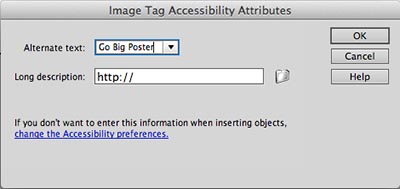
- The Image Tag Accessability Attributes (Alt) dialogue box opens
- Type in an approopiate name for the Alt tag
- Click OK
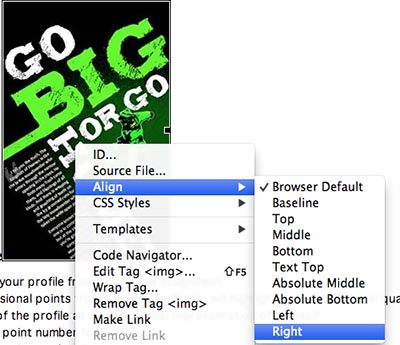
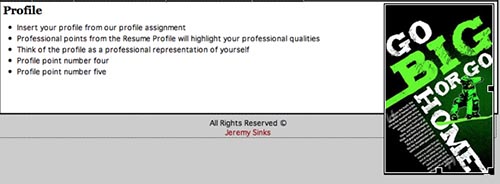
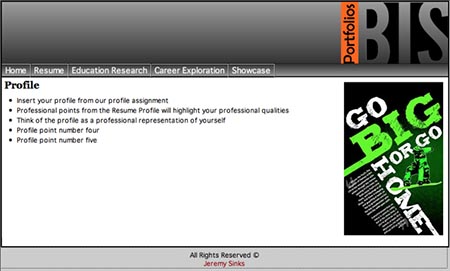
- You should see the "Go Big" graphic inserted to the left of the heading "Profile" similar to the image below – we will fix the formatting of this in the next step
- Right-click on the image to bring up a set of formatting options
- Select Align > right
- The graphic should snap to the right of the Profile bullet points
- If you don't have enough text to fill out the length of the image like in the example below,we will fix this in a later step

Styling the <img> Tag
For images inserted in our content <div> tag, we want to add a bit of padding around the image to space other elements, such as text, away from the image
- Click the graphic we just inserted
- Make sure the <img> tag is selected in the Tag Selector
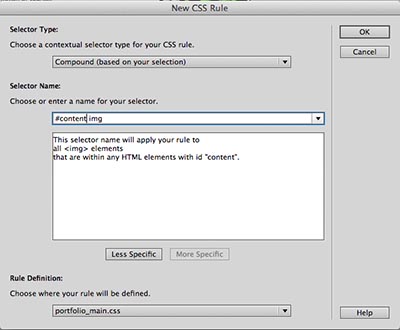
- Click the New CSS Rule button
- The New CSS Rule dialogue box opens
- Click the Less Specific button one (1) time
- If you ended up with an "h1" in your selector name, i.e. #content h1 img, delete the "h1" and the extra space so your selector name looks like the image below
- Click OK
- The CSS Rule Definition for #content img dialogue box opens
- Select the Box property in the Category column
- In the Padding property section, Type in 5 for all four sides (leave the "same for all" box checked) and leave the value type as pixels (px)
- Click OK
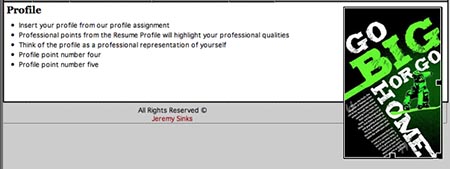
- You should see additional padding around the image like in the example

Note: If your graphic is longer than your profile points, move to the next step
Creating a "Clear" Class Optional Step for Long Graphic
If the bulleted list is shorter than the graphic, the graphic will appear to fall outside of the content area. This is because the content <div> only expands to fit text, not images. If we leave the page in this way, in the next tutorial we will have problems inserting the Goals section as a nested <div> tag.
We're going to fix this issue by creating a useful class called "clear" which essentially makes a point in our document that acts as a new starting point in our content <div> tag.
- First, click the New CSS Rule button
- The New CSS Rule dialogue box opens
- Change the Selector Type to Class in the drop down menu
- Type "clear" in the Selector Name box
- click OK
- The CSS Rule Definition for .clear dialogue box opens
- Select the Box propety in the Category column
- In the drop down menu for the Clear property, select "both"
- In the Padding property section, type 0 for all four (4) sides (leave the "same for all" box checked) and leave the value type as pixels (px)
- In the Margin property section, type 0 for all four (4) sides (leave the "same for all" box checked) and leave the value type as pixels (px)
- Click OK
- Make sure you have inserted at least one (1) extra space beneath the bulleted list by hitting the enter/return key 2 times at the end of the last bullet point
- Place the cursor in the extra space
- Switch to Code View by clicking the "Code" button in the View menu
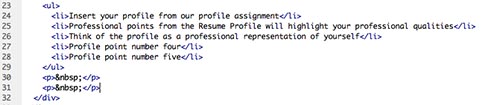
- Find where your cursor is placed – it should be in the same location where you placed it in design view in the empty paragraph
- Note: depending on how much content you have at this point, the corresponding line numbers in your document may different than the example
- Hit the enter/return key one (1) time after the closing </p> tag so you have a new line
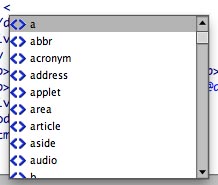
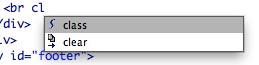
- Hit the "<" on your keyboard
- The Code Hinting window pops up with a list of all the tags
- Type "br" – the Code Hinting box "jumps" to the br tag
- Hit the enter/return to confirm selection of the <br> tag
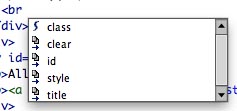
- Hit the spacebar on your keyboard
- The Code Hinting window pops up again, but this time displays attribute options
- Type "cl" – the Code Hinting box jumps to tags that start with "cl"
- Select the class attribute
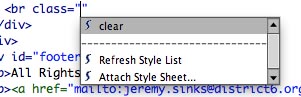
- The Code Hinting box changes to a list of created classes
- Select "clear"
- Hit the ">" key on your keyboard to automatically close the tag to read <br class="clear" /> like in example below

- Switch back to Design View by clicking the Design button in the View menu
- Your graphic should now fit nicely in the content <div> tag
Next Steps
In the next exercise, we are going to create a nested <div> region to house the Goals section.
