

Portfolio: Navigation
Inserting Link Placeholders
In order to start styling our navigation list, we need to create links for each of the list items. However, there is a small problem – we haven't created the pages yet to link the list items!
The solution: we will use link place holders to simulate a link for each of the list items. Link place holders act and look like a link, but when clicked by a user, they don't go anywhere. The process for creating a link placeholder is similar to creating a link.
- Highlight the "Home" text
- In the Properties Inspector, type "#home" in the Link box (see image below for reference)
- Click the cursor inside the "Home" text – you should see the text change to a link
- By default, unless changed in the Page Properties, links are blue and underlined. Standard web design practices uses this default formatting because people are used to seeing links styled in this way. We will change the formatting of these links in the next section to better suit our needs for navigation
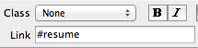
- Next, highlight the "Resume" text – please note, the "Resume" text can be diffuclt to highlight, so be precise about where you place the cursor
- In the Properties Inspector, type "#resume" in the Link box (see image to the right for reference)
- Continue to create link placeholders for the rest of the bulleted items in the navigation list
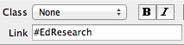
- For the links with two words or more, make sure you don't use any spaces between the words in the link box. For example, the link placeholder for Education Research should be similar to "#EdResearch"
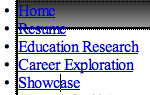
- Once you finish creating link placeholders, your navigation list should look like the image below


Next Steps
In the next exercise, you will begin styling the navigation list to create the look and feel of a navigation menu.
Click here for the next tutorial
